Showing posts with label recipes. Show all posts

Jul 23, 2015

Grilled Pork Tenderloin with Clean BBQ Sauce

0 COMMENTS
It's still summer! We are making full use of good weather by grilling our favorite meals. This is an all-time family treat...grilled pork tenderloin. This is the perfect cooking method to ensure your pork is tender and juicy - not dry and stringy! Enjoy!


GRILLED PORK TENDERLOIN with CLEAN BBQ SAUCE
Serves: 4-6

PORK INGREDIENTS
  • 2 pork tenderloins (1 lb total)
  • 1 tsp garlic powder
  • 1 tsp salt
  • 1 tsp black pepper
  • 1 cup BBQ Sauce (see recipe below)

DIRECTIONS
  • Prepare grill for indirect heat.
  • Season meat with garlic powder, salt, and pepper.
  • Lightly oil grill grate. Place tenderloin on grate and position drip pan under meat. Cook over indirect heat for 30 minutes.
  • Brush tenderloin with BBQ sauce. Flip and coat with BBQ sauce. Continue cooking for 15 minutes or until meat temperature reads 145 degrees F.
  • Allow pork to rest for 10 minutes. Slice and serve with additional BBQ sauce for dipping.

CLEAN BBQ SAUCE

INGREDIENTS
  • 1/2 cup tomato paste
  • 1/2 cup water
  • 4 Tbsp Worchestershire sauce
  • 2 Tbsp garlic powder
  • 1/2 tsp salt
  • 1 tsp black pepper
  • 2 Tbsp raw honey or maple syrup

DIRECTIONS
  • Mix all ingredients in small bowl. 
  • Use immediately or store in refrigerator for up to 3 weeks in airtight container.


Pork adapted from AllRecipes
Clean Sauce adapted from My Whole Food Life

May 11, 2015

Stuffed Portobella Mushrooms

4 COMMENTS
I LOVE helping others improve their nutrition, fitness, and overall lifestyle! Some people muddle through the changes, but most embrace their newfound health and happiness. My good friend, Shannon has grabbed her life by the horns and is rocking out 21 Day Fix. This recipe comes straight from her culinary creativity and is approved for 21 Day Fix. Oh!...and it's delicious!


STUFFED PORTOBELLA MUSHROOMS

Yield: 2 stuffed mushrooms

INGREDIENTS
  • 2 medium/large portobella mushrooms
  • 1.5 cups ricotta cheese
  • 1 cup fresh baby spinach, rinsed and pat dry
  • 1 Tbsp italian seasoning
  • 1 tsp garlic powder
  • 1/4 tsp salt
  • 1/8 tsp pepper (optional)
  • 2/3 cup mozzarella cheese

DIRECTIONS
  • Preheat oven to 350 degrees F.
  • Rinse mushrooms. Pat dry and set aside to fully dry.
  • Combine ricotta, seasonings, spinach, and 1/3 cup of the cheese.
  • Divide mixture evenly and stuff each mushroom. Top with remaining cheese.
  • Bake at 350F for 20-25 minutes. 
  • Serve with your favorite side.

21 Day Fix count: 1 mushroom = 1.5 green, 1 red, 1 blue

Adapted from: Shannon Carey

Mar 24, 2015

Simple Stuffed Peppers

0 COMMENTS
This amazing dish has always been a favorite in our family! I recently found a wonderful recipe for stuffed peppers and guess what?? ...more flavorful and healthier! Enjoy!


SIMPLE STUFFED PEPPERS

Yield: 4 stuffed peppers

INGREDIENTS
  • 4-6 red or green bell peppers
  • 1 lb. lean ground turkey
  • salt, pepper, garlic powder to season
  • 3/4 cup yellow onion, diced
  • 3/4 cup bell pepper, diced (used from tops of peppers)
  • 3/4 cup marinara sauce (pick your favorite)
  • 1/4 cup Arrabbiata pasta sauce (for a flavor kick)
  • 1 cup shredded mozzarella cheese (may substitute with cheddar)
  • 1/4-1/2 cup shredded cheddar cheese for topping

DIRECTIONS
  • Cut tops of peppers and clean out seeds. Reserve pepper tops and dice for filling. Set aside.
  • Cook ground turkey over medium heat until no longer pink. Drain.
  • Add in diced peppers, onions, and seasoning. Saute with meat until slightly tender.
  • Add both pasta sauces until meat and veggie mixture are barely moist. Add in cheese, reserving 1/4 cup for topping. Stir until cheese is melted. 
  • With peppers upright in foil lined pan, fill each one with meat mixture. Top with cheddar cheese. Cover by tenting loosely with foil.
  • Bake at 350 degrees F for 30 minutes. Remove foil and continue to bake for 15 minutes or until cheese is golden.
  • Serve warm!
** Quick tip: Evenly cut off bottoms of peppers so they will easily stand in baking pan. Be sure not to cut off too much as this will leave holes in the bottom of the pepper.


Adapted from: Kalyn's Kitchen

Feb 7, 2015

Hearty Oatmeal - 2 Ways

0 COMMENTS
Oatmeal is one of my favorite, easy go-to breakfast meals. It is the perfect choice to fuel my morning and just like Greek yogurt, there are so many options to make it your own!


A great variation is this banana bread slow cooker oatmeal from Garnish with Lemon (ingredients photographed below). This method uses steel cut oats, so it is a bit thicker. Initial prep takes more planning, but this recipe is easy to make on Sunday and keep for breakfast all week!


My favorite method uses quick oats made on the stove. Ready in less than 5 minutes and family approved! If you are following the 21 Day Fix nutrition plan, this is a very hearty way to start your day!


Hearty Quick Oatmeal with Fruit

INGREDIENTS

  • 1/2 cup water
  • 1/4 quick oats
  • 3 Tbsp egg whites
  • 1 tsp coconut palm sugar or agave
  • 1 cup blueberries or favorite fruit

DIRECTIONS

  1. Bring water to a boil in small saucepan. 
  2. Stir in quick oats and cook for 30 seconds on medium heat.
  3. Stir in egg whites and cook for an additional 45-60 seconds, until desired consistency. Oatmeal will thicken a bit as it cools.
  4. Pour cooked oatmeal into bowl and add coconut palm sugar.
  5. Stir in blueberries and enjoy!

21 Day Fix count: 1 yellow, 1/2 red, 1 tsp, 1 purple 

Feb 5, 2015

Say It Sweetly...Frosted Popcorn

0 COMMENTS
My daughter loves snack day at school, especially when she gets to bring it for her friends and teachers. Our most recent snack was frosted popcorn and was a huge hit! I was able to make three batches the night before school and store in food bags. The next morning, Miss C helped me assemble snack bags and added conversation hearts to each one. The perfect Valentine or anytime treat!


FROSTED POPCORN

Yield: 27 servings (1 cup each)

INGREDIENTS
  • 3 packets of lightly salted microwave popcorn (I used Pop Secret Sea Salt)
  • 1 bag candy melts in your favorite color (found at local craft store)
  • Nonpareils or sprinkles of your choice
  • Conversation candy hearts or preferred garnish (optional)

DIRECTIONS
  • Pop 1 packet of popcorn in microwave as directed. Pour cooked popcorn into large bowl. 
  • Melt 1/3 of candy melts in glass measuring cup for 30 seconds until melted. 
  • Stir melted chocolate with a spoon and drizzle over popcorn. Using a large spoon, stir popcorn and chocolate mixture until evenly coated. 
  • Add nonpareils or sprinkles while the chocolate is still warm. Stir again and transfer to airtight bag or container. 
  • Allow to cool before adding conversation heart candy or other garnish. Repeat with remaining popcorn packets. Serve or package as desired. Enjoy!


Feb 3, 2015

Greek Yogurt

0 COMMENTS
So many times, I find myself wandering to the refrigerator looking for something to eat...it's almost a mindless habit. Once I'm there perusing my food options, it's nice to have healthy options staring at me instead of chips, crackers, and cookies. This Greek yogurt snack has been a wonderful healthy alternative! It is perfect for a quick breakfast or a sweet evening snack. If you are not a fan of the taste of Greek yogurt, experiment with different add-ins. Read on for ideas. Easy enough to make in a hurry and very filling! Enjoy!


SWEET GREEK YOGURT

INGREDIENTS

   3/4 cup non-fat, plain greek yogurt (I like Fage)
   1 tsp agave or honey
   1/4 cup blueberries
   1/2 tsp pecans, almonds, or walnuts (opt)


DIRECTIONS

   Measure yogurt and add agave. Stir well and add your favorite berry, nuts, or chocolate chips. Enjoy!

MORE IDEAS: Try mixing Shakeology or PB2 (powdered peanut butter) in with yogurt for a smooth mousse and garnish with chocolate chips. Mix with mashed bananas and pecans. What's your favorite?

Jan 19, 2015

Egg Muffins ...on the go

0 COMMENTS


Breakfast is a must! Since my son started Kindergarten, there are more daily tasks that need to be done each morning. Breakfast for kids, pack snacks and lunches, get dressed, bundle up, pack up bookbags, homework, and on and on...

I love stovetop oatmeal, but it takes time! These egg muffins are an easy grab and go solution for breakfast and will give you the protein and fresh veggies you need to start your day right. And it's 21 Day Fix friendly. One batch makes 12 for the week... how easy it that?! What's your favorite, easy breakfast?


Recipe:
Yield: 12 muffins

Ingredients:
  • 8 whole eggs
  • 3/4 cup egg whites
  • 1 cup green or red bell pepper, chopped
  • 1/2 cup grape tomatoes, halved
  • 1/2 cup turkey bacon, cooked and crumbled (4-5 slices)
  • olive oil spray
Directions:
  1. Preheat oven to 400F and lightly grease a muffin tin pan with olive oil.
  2. In a medium bowl, combine whole eggs and egg whites. Whisk. Add all other ingredients and mix until combined.
  3. Fill muffin tins 3/4 full with egg mixture.
  4. Bake for 10-12 minutes until egg is set. Remove from oven and cool for 5 minutes before removing from pan.
  5. Muffins may be stored in refrigerator for up to 7 days. To serve, lightly warm and enjoy!

21 Day Fix conversion: 2 muffins = 1 red, 1/4 green

Jan 13, 2015

Margherita Pizza + Wheat Crust

0 COMMENTS

I LOVE pizza! I also know what it does to my body when we have it delivered. This is the perfect compromise to enjoy pizza while keeping nutrition clean. It is also an added perk that I can involve the kids in making this recipe! My daughter loves rolling out the pizza dough and they both 'ooooo' and 'ahhh' as they watch the ball of crust dough rise...don't worry, it's a quick-rise recipe and absolutely amazing!


For the Crust: 
crust adapted from The Fit Housewife

Ingredients:
  • 1 cup all purpose flour
  • 1/2 cup whole wheat flour
  • 2 Tbsp chia seeds or flax 
  • 2 1/4 tsp quick rise yeast (1-1/4 oz packet)
  • 1/2 tsp salt
  • 2/3 cup warm water
  • 2 tsp extra virgin olive oil
  • 2 tsp honey or agave
Directions:

  1. In a medium bowl, combine the flours, chia/flax, yeast, and salt. Mix together with a wooden spoon.
  2. Using a liquid measuring cup, measure the warm water. Then, stir in the olive oil and honey. Pour wet mixture over dry ingredients and stir with a wooden spoon to form a ball. Turn dough out onto a lightly floured surface. Knead for 2 minutes. Spray the bowl with olive oil spray and place dough in bowl. Cover with plastic wrap and let dough rise in a warm place until double in size, about 20 minutes. Meanwhile, spray a pizza pan with olive oil spray and set aside. You may also use a pizza stone and no oil is needed. Preheat oven to 425F.
  3. When dough has risen, place ball on a lightly floured surface. Using a rolling pin, roll dough into a 12-inch circle. Transfer dough to your prepared pizza pan. Bake in oven for 5 minutes. Remove from oven and add toppings.

For the Pizza:

Ingredients:
  • 1 small jar or tube of prepared pesto sauce
  • 3 small roma tomatoes, sliced
  • 8 oz fresh mozzarella cheese, sliced (from cheese log)
  • 8 oz shredded mozzarella
Directions:

  1. Once the crust has baked for 5 minutes, begin adding toppings. Cover crust with pesto sauce, leaving a 1-inch perimeter of crust. 
  2. Sprinkle 4 ounces of shredded mozzarella over pesto. Top with sliced tomatoes and sliced fresh mozzarella. Top with remaining shredded cheese.
  3. Bake in oven for 10-12 minutes or until cheese is melted. Remove, cool, slice, and serve!

Sep 5, 2013

Carrot Cake with the Perfect Frosting...finally!

0 COMMENTS
My dad LOVES carrot cake! Since I was young, one of his co-workers has the long-standing record of baking the best carrot cake {...and other pies}. I enjoy baking and enjoy sharing my talents. I also strive to make a cake equally as amazing as my dad's friend.


Each year for his birthday, I attempt a carrot cake. Usually it is a new recipe because the one from last year just didn't 'wow' me. Well, this year the new recipe paid off. It was simple and delicious. Moist, but not heavy with nuts and pineapple and...everything from the pantry we sometimes throw into a carrot cake. It was perfect...and from Pioneer Woman. I can always count on her to bring goodness to my {baking} life! Visit her site to find the most amazing Sigrid's Carrot Cake recipe!

And since I was over-achieving this year, I decided to knock the icing out of the park too. It started with the usual butter, cream cheese, and powdered sugar. I tasted it...blech!! Just yuck. Too sweet...not creamy. So I saved it...with all my might. I added Cool Whip. Yes, the real over-achievers would have heavy cream on hand and would make their own whipped cream. I am not that amazing. It was the best, most delicious, spot-on cream cheese icing I have ever made. It didn't glop on the floor when I iced the cake and I was even able to decorate with piped flowers, no problem. It even made enough to coat the entire double layer cake with some to spare for decorating. Icing shortage is a pet peeve of mine. Here is the recipe. Enjoy it like there is no tomorrow!

Best Cream Cheese Frosting...finally

- 1/2 c. unsalted butter (1 stick)
- 8 oz. cream cheese
- 1 1/3 c. powdered sugar (or as much as you see fit)
- 8 oz Cool Whip

Beat butter and cream cheese. Mix in powdered sugar until well-combined. Taste as you go to make it perfect. Fold in Cool Whip. Enjoy!

Aug 8, 2012

Babies, Italian, and Apple Pie

0 COMMENTS
It's baby season! ...meaning there have been several new little ones lately. The kiddos and I wanted to visit, but I remember being a new mom. After the overwhelm of visitors in the hospital, it is relieving to be home alone with a snuggly, smooshy new baby. The last thing I wanted to do as a new mom was plan dinner and cook! We decided to make a few quick trips to provide a meal and take a peak at some sweet newborns!

After a lot of searching, I found a great meal to deliver to the new mommas. A little more gourmet than I am used to cooking, but these lasagna roll ups from Cooking Classy were easy and portable for our visit. They feature a cheese mixture and homemade meat sauce all rolled up into individual lasagna noodles. This is also a great freezer meal to make in bulk and for gatherings!


I also made my favorite Scrumptious Apple Pie from The Pioneer Woman! I made this pie for a local fall festival apple pie contest and it was amazing! No fancy spices used...just the amazing flavor of juicy apples. I use a mix of Braeburn and Granny Smith to give it a delicious balance of sweet and tart. 


If you have never gambled to make a pie crust from scratch, Sylvia's Perfect Pie Crust is easy and well...perfect! 


The best part is we got to meet little Makayla and Hampton and were overjoyed to offer some help and good food!

Feb 7, 2012

Sugar, Sugar!

1 COMMENTS

Sugar cookies have become a family tradition at our home for Valentine's Day. Mr E loves helping cut out shapes...while eating dough of course. Most years, the experience is more fun than tasty. The chosen recipe usually yields brick hard, crunchy cookies. I am a soft cookie kind of girl and finally found a recipe that is delicious! {and soft, and melty, and amazing, and ...}

Here is the Amazing Sugar Cookie recipe from I Am Baker. Run to your kitchen and whip some up...trust me! {...and don't forget to grab the butter...eek!}

Here are the down and dirty details for you to enjoy!

from I Am Baker:
"Ingredients
  1. 1-½ cup Butter (I Use Unsalted)
  2. 2 cups Sugar
  3. 2 whole Eggs
  4. 2 whole Eggs Yolks
  5. 4 teaspoons Vanilla Extract
  6. 2 teaspoons Almond Extract
  7. 4 cups All-purpose Flour
  8. 1 teaspoon Salt
  9. 1 teaspoon Baking Powder
Instructions
  1. In a mixer, beat butter and sugar until well combined, about 2 minutes.
  2. Add in 2 eggs and 2 egg yolks and mix until combined.
  3. Add in vanilla and almond extract; mix until combined.
  4. In a separate bowl, sift together flour, salt, and baking powder. Slowly (about a cup at a time) add flour to butter mixture and combine. You can use a mixer or not, just depends on how strong you are. ;)
  5. I usually just mix ingredients until they are combined, as I have heard that if you over-mix this dough it will get tough.
  6. Put dough in some Saran wrap and refrigerate for at least one hour. When you are ready to bake, heat oven to 350 degrees. Roll dough out, cut out cookies, and bake for 6-8 minutes."
I followed the recipe exactly without problem. I threw my rolling pin out the window since the dough was very gooey. I used my hand to 'roll' the dough and then cut out the cookies. Much faster and my handprints were disguised by the icing in the end.

ENJOY some tasty cookies with your sugar!

Sep 18, 2011

Spooky Cake

12 COMMENTS
I have been itching to try the Thin Mint Cake found over at Joyful Baker! I love all things chocolate and mint always adds a delicious twist. I made the cake as directed, but used Crisco baking sticks and added a teaspoon of vanilla for a bit more flavor.


While the cake was cooling, I brainstormed about which frosting to use. A buttercream seemed to rich for the mint flavor {and I was out of butter}. I remembered the fluffy, creamy, lemon topping used in Lemon Raspberry Tiramisu...perfect! I halved the lemon cream filling recipe and used less lemon flavoring. I was nervous it would be too runny to ice the cake, but it was juuusst right!


And in the spirit of the season, I decided to add some spooky Halloween drizzle. 


For the chocolate, I melted 1/4 cup semi-sweet chocolate chips with 1/2 Tablespoon of margarine. I watered it down until it was the right consistency for drizzling. I then used a fork to 'fling' the chocolate over top of the cake.


I had a little lemon cream leftover and added food coloring {yellow and a bit of red} to make it orange. I then heated it {in the microwave} for 15 seconds...it was just right for drizzling and the color became a more vivid orange!


Mr. E and I searched for our creepy plastic spider to make it extra spooky. Nowhere to be seen...eek! 

The cake is a lovely texture and has a certain spice that compliments the season!! Enjoy!

Aug 22, 2011

Lemon Raspberry Tiramisu

19 COMMENTS

I discovered this amazing dessert while pregnant with Mr. E. I was diagnosed with gestational diabetes and had to follow a strict carbohydrate controlled diet. I am addicted to sweets, so I spent the last three months of my pregnancy searching for yummy {healthier} treats. This dessert has less sugar by using a Splenda substitute and still tastes wonderful! {I could shovel in just the lemon cream filling...by the spoonful in a quiet corner.} Three years later, Lemon Raspberry Tiramisu is highly requested for family gatherings.

This recipe is adapted from TLC Cooking, which uses an 11x7 inch pan. My recipe below uses a 9x13 inch pan. Be sure to visit the recipe link for nutritional information.

Let's get started!


INGREDIENTS:
3 packages (3 oz each) ladyfingers {found in the bakery/bread aisle}
1 pint fresh raspberries OR frozen, unsweetened raspberries

Lemon Cream Layer:
2 packages {8oz each} fat-free cream cheese, softened
1/4 + 1 Tbsp Splenda for baking
1 tsp vanilla
1/3 cup water
1 package {4-serving size} sugar-free lemon flavored gelatin
4 cups thawed cool whip {fat free or light}

Fruit Layer:
1 - 12 oz jar sugar free strawberry OR red raspberry preserves
1/3 cup water
2 Tbsp Marsala wine


DIRECTIONS:
1. Start by making the lemon cream filling. Combine cream cheese, sugar substitute and vanilla in large mixing bowl. Beat with electric mixer at high speed until smooth; set aside.

2. Combine water and gelatin in small microwavable bowl. Microwave on HIGH for 30- 60 seconds or until water is boiling and gelatin is dissolved. Cool slightly.

3. Add gelatin mixture to cream cheese mixture; beat 1 minute. Add whipped topping; beat 1 minute more, scraping sides of bowl. Set aside.


4. Whisk together preserves, water and marsala in small bowl until well blended. Spread 1/2 to 1 cup preserves mixture evenly over bottom of 9 x 13-inch baking dish.


5. Arrange one layer of ladyfingers {using 1.5 packages} over the fruit mixture base.


6. Spread half of lemon cream mixture evenly over ladyfingers.

7. Sprinkle raspberries evenly over cheese mixture.


8. Top with remaining ladyfingers.


9. Spread remaining preserves mixture over ladyfingers.


10. Top with remaining lemon cream mixture. Cover and refrigerate at least 2 hours. Garnish as desired.


 ENJOY this lovely {and slightly healthier} dessert!


p.s. Don't forget to stop by The BIG 100 and enter to win a Sephora gift card!

Jul 26, 2011

S'more Goodness! {with a twist}

12 COMMENTS
There has been a lot of S'more ideas floating around. They all look delicious and bring me back to my younger years when we made Peanut Butter S'mores in the oven! They are THE perfect combo of peanut butter and chocolate {an all-time fav of mine}!


This snack is so easy, quick, and a great activity to involve little ones in the kitchen. Mr E loved helping stack the ingredients. Let's get started!

What you will need to make 6 s'mores:
- 6 sheets graham crackers, broken in half
- 2- 1.5 oz chocolate bars
- 6 marshmallows
- 3 Tbsp of peanut butter {give or take a little}

Turn on your oven to broil. Start by placing 6 graham cracker halves on a baking sheet. Then smear them well with your favorite peanut butter!


THE MORE, THE BETTER!

Then, top each with a marshmallow. Place pan in the heated oven for 1 minute {or less}. Watch them like a hawk...the marshmallows toast quickly under the broiler! Have your others toppings ready to stack on the warm, gooey marshmallows.


Once you remove the pan from the oven, top each with chocolate and then another graham cracker square.


GOOEY, MELTY PEANUT BUTTER!

Then, sit in a quiet, secluded place to wallow in the gooey goodness you just created!


Jul 25, 2011

Best Dessert EVER!

7 COMMENTS
Usually I would laugh if a dessert claimed to be the best and did not contain a form of chocolate. However, this Blueberry Buckle is definitely at the TOP of my dessert list! Why? It encompasses the best of sweet baking...fruit, pie, and cake!


This amazing treat is similar to a coffee cake and fruit crisp rolled into one. It features a blueberry base, layered with cake batter, and topped with a streusel. Check out the bountiful benefits of blueberries! YUM!


You can find the full recipe at Joy of Baking!

Off to have another taste...ENJOY!

Jul 17, 2011

Chocolate...The German Kind

4 COMMENTS

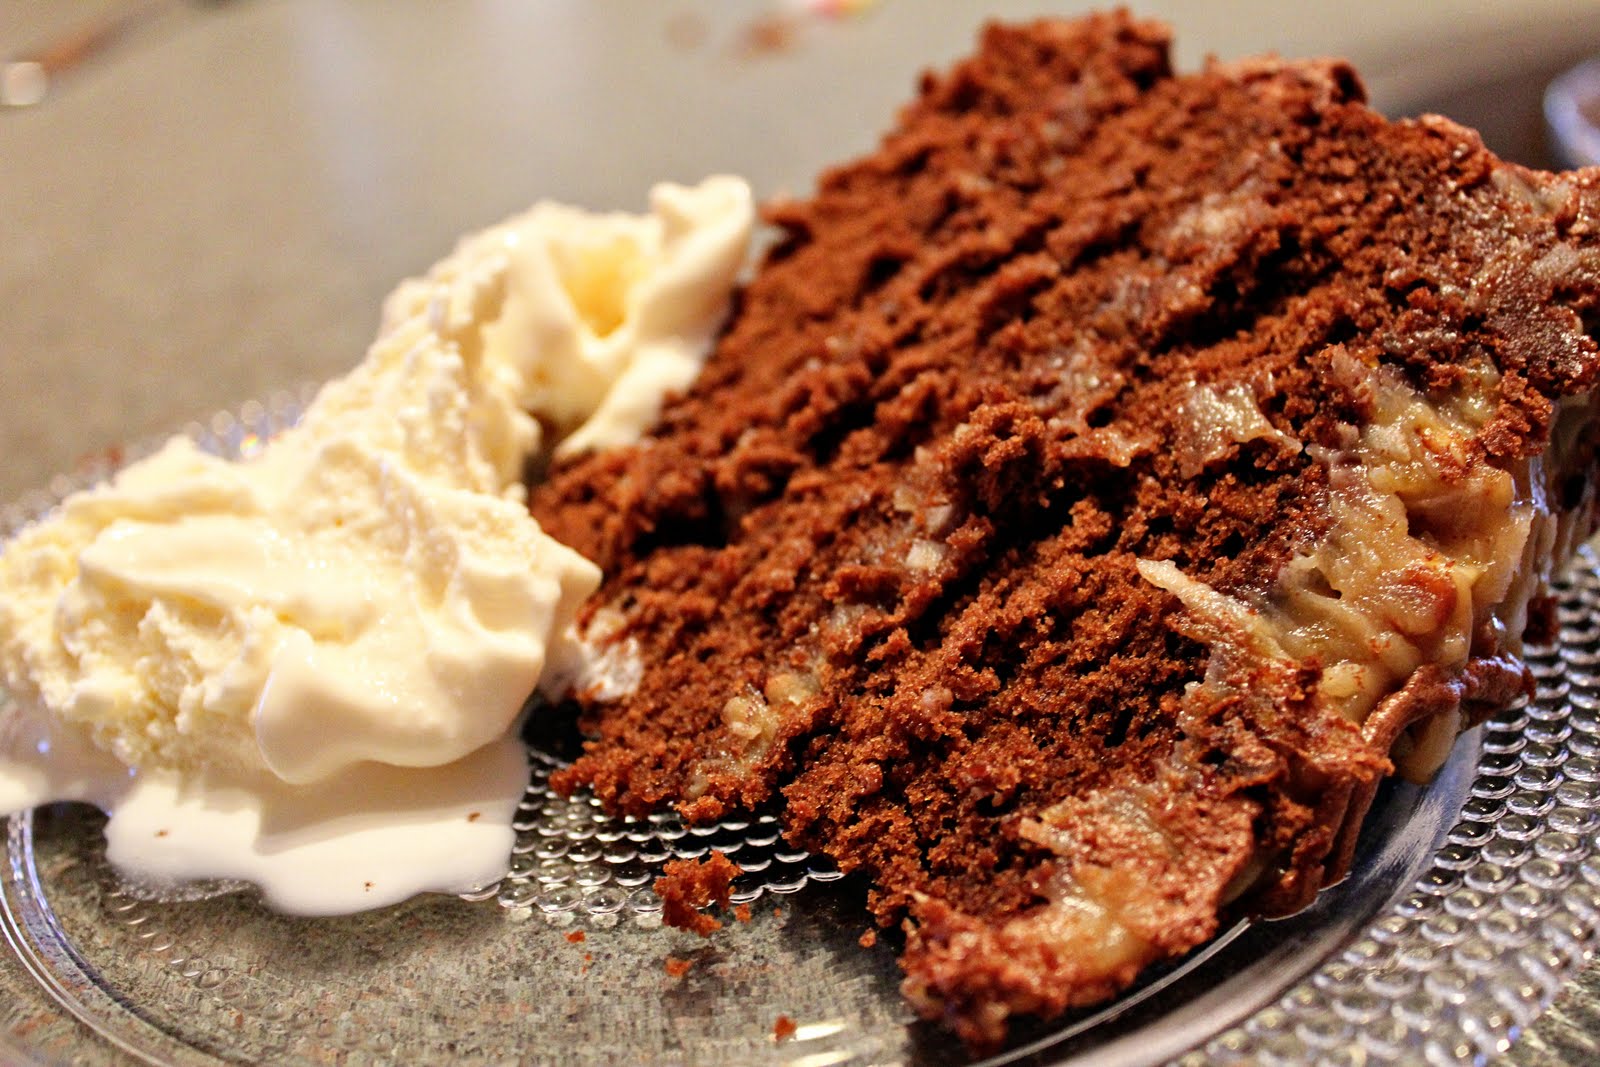
I mentioned a German Chocolate cake {made from scratch} HERE. So, as promised here are the details!

This cake is my Mom's most favorite cake. Especially to indulge in for birthday celebrations. This year was no exception, but I wanted to kick it up a notch.

In past years, the cakes {while VERY tasty} looked something like this.


And this...
Yes, those are matches! {candles were unavailable}

Most German Chocolate cakes {made the old-fashioned way} are not meant to have icing on the sides. It is my inference that this is why most recipes for the pecan, coconut frosting never make enough to ice the entire cake, sides included.

I recently saw a German Chocolate cake with ganache frosting on the sides that inspired me to try something new!

I used this recipe from The Nibble for the cake and pecan coconut frosting and this recipe from David Lebovitz for the chocolate frosting. The cake is VERY dense and yummy! The chocolate frosting instructions do not mention whipping the mixture once cooled. If it is not whipped, it is way to runny to decorate your cake. I beat the chocolate icing mixture for 5-10 minutes after it had cooled to room temperature. After studying this cake border how-to video, I added a shell border using chocolate frosting.

And here is the final result! Much better than past years, but still room for improvement. It was delicious!