Showing posts with label sewing. Show all posts
Showing posts with label sewing. Show all posts
Jan 17, 2012
Curtain for Curtain
I finally found time {and a babysitter...thanks Kel} to take a trip to Ikea. It is over two hours away so I had to be sure of my wish list and measurements! I made out with a lot of great items for the new home...mostly storage for my craft space!
In addition to furniture, I found some fun things to make the kids' bathroom more FUN! They used to share a bathroom with our guests and so it was always very 'adult' decor. I found towels for $5 each and a fun, soft bath rug. I also loved the Barnslig Randig window curtains in the Ikea showroom. I was drawn to the primary colors and gender neutrality since Mr and Miss share the space.
Once home, I got to work transforming the window panels into a festive shower curtain. I sewed the two panels together {thank goodness the design pattern matched up!} and then made 12 evenly spaced buttonholes at the top hem of the curtain. I finished out the buttonholes by cutting slits and adding anti-fray solution for durability.
It was so easy and looks amazing! I love the colors and the simple, yet fun design. Mr E and Miss C are excited to enjoy it as well! I am hoping to have more new home reveals coming up soon!
Nov 7, 2011
Minnie Mouse
Miss C was Minnie Mouse for Halloween this year! I have fond memories of the handmade red and white polka dot felt costume my Mom made for me when I was little. Painted face, black tights, and big ears finished with a red bow.
Carrying on the tradition of handmade Halloween, I was excited to whip up a cute original for Miss C. Unfortunately Minnie patterns do not resemble the original red and white dot dress I knew growing up. Most are hot pink and with that modern flair. I decided to use another basic dress pattern that resembled the Minnie dress that featured puff sleeves, scoop neck, and full skirt. I chose McCall's Pattern M5793 and it was perfect!
I altered the pattern a bit since this was only for a Halloween costume. The dress was made using Dress D (pictured in pink). I did line the bodice, but skipped making a skirt lining and petticoat, and omitted the bottom hem ruffle. The skirt still had plenty of fullness and oomph! The neck and sleeve hem was finished using white double fold bias tape. I also added a white satin ribbon sash with bow to complete her look. Overall the pattern was super easy to follow and to construct.
A little black nose, eyelashes, and red bow ears made Miss C one of the cutest Minnie Mouse girls!
Sep 22, 2011
Thursday Threads: Tank Dress Tutorial
I have recently oooo'd and ahhh'd at the lovely clothing by Matilda Jane. A modern, but also girly and frilly touch. Too bad the MJ dresses cost a mint! I could not justify spending the moolah for a dress Miss C will quickly grow out of. Keeping with the famous words of my Mother, I made it for less!
You will need a few materials:
Start by pre-washing all of your fabrics, including the purchased cotton tank or shirt. This will pre-shrink all materials to prevent your finished product from becoming wonky after its first laundering.
Now it's time to get crazy and cut your tank! I cut across the top 3 inches below the underarm seam. Be sure to allow for seam allowance.
I applied a 1/2 inch strip of interfacing to the raw edge of the chopped top to add more structure to the bodice/skirt seam. I used DecorBond {from my stash}, but a lighter weight interfacing can be used.
Next prep your skirt! Place both pieces right sides together and stitch each side seam using a 1/4" seam allowance. Finish your raw edge with zigzag or interlock {serger} stitch.
Time to add some volume! Baste the top edge of your skirt leaving long thread tails for gathering. I tested my sewing machine's ruffler foot and was amazed at the awesome gathering that resulted in less than 2 minutes! Once you baste, pull up your bobbin threads to create gathers.
Fit the skirt {right sides together} to the interfaced edge of your cotton tank. Be sure to line up your side seams!
Pin and stitch 1/2" seam allowance. The more pins, the better! Over pinning will help ease the gathered skirt. Slow and steady to make a lovely gathered skirt seam.
Once the skirt is sewn to your cotton tank, turn right side out and top stitch. My seam wanted to roll a bit due to the stiffer interfacing. The top stitching will add stability and will prevent raveling. You can also add zigzag or interlock stitch to the seam allowance.
You're almost finished!! Lay out your dress on a flat cutting surface {make sure it's even}. Now with your scissors or rotary cutter, even up the skirt hem.
Position your trim or ribbon {right sides together} along the skirt bottom raw edge. Pin and stitch 1/4" seam allowance. Top stitch in place.
Miss C wore this to Mr. E's Third Birthday Party. She looked absolutely adorable toddling around in her pretty dress!
Wanna learn how? Of course you do!
You will need a few materials:
- Ready to wear cotton tank or shirt
- 1/4 yard of fabric for the skirt, cut 2 pieces each 9.25" x 22"
- 45 inches of ribbon or finished trim for skirt hem
- 45 inches of fusible lightweight interfacing, 1/2" wide strip
- Rotary cutter or scissors
- Matching thread

Start by pre-washing all of your fabrics, including the purchased cotton tank or shirt. This will pre-shrink all materials to prevent your finished product from becoming wonky after its first laundering.
Now it's time to get crazy and cut your tank! I cut across the top 3 inches below the underarm seam. Be sure to allow for seam allowance.
I applied a 1/2 inch strip of interfacing to the raw edge of the chopped top to add more structure to the bodice/skirt seam. I used DecorBond {from my stash}, but a lighter weight interfacing can be used.
 |
| APPLY INTERFACING TO THE WRONG SIDE |
Next prep your skirt! Place both pieces right sides together and stitch each side seam using a 1/4" seam allowance. Finish your raw edge with zigzag or interlock {serger} stitch.
Time to add some volume! Baste the top edge of your skirt leaving long thread tails for gathering. I tested my sewing machine's ruffler foot and was amazed at the awesome gathering that resulted in less than 2 minutes! Once you baste, pull up your bobbin threads to create gathers.
Fit the skirt {right sides together} to the interfaced edge of your cotton tank. Be sure to line up your side seams!
Pin and stitch 1/2" seam allowance. The more pins, the better! Over pinning will help ease the gathered skirt. Slow and steady to make a lovely gathered skirt seam.
Once the skirt is sewn to your cotton tank, turn right side out and top stitch. My seam wanted to roll a bit due to the stiffer interfacing. The top stitching will add stability and will prevent raveling. You can also add zigzag or interlock stitch to the seam allowance.
You're almost finished!! Lay out your dress on a flat cutting surface {make sure it's even}. Now with your scissors or rotary cutter, even up the skirt hem.
Position your trim or ribbon {right sides together} along the skirt bottom raw edge. Pin and stitch 1/4" seam allowance. Top stitch in place.
Ta da!! You did it! So easy, so cute, and best of all...so affordable!
Miss C wore this to Mr. E's Third Birthday Party. She looked absolutely adorable toddling around in her pretty dress!
Aug 4, 2011
Thursday Threads: Sewing Basics
Several readers have asked ‘How do I learn to sew’?
Here are some pointers on how to START!
I learned how to sew from my MOM! She is an amazing seamstress, award winning quilter, and also creates unbelievable surface design! My sisters and I all participated in 4-H, mainly with sewing and needle crafts. Each year, we were challenged just a bit more and always judged to perfection! Every seam HAD to be straight and every crease HAD to be pressed. 4-H taught us to be meticulous while still challenging our sewing knowledge and skills. Sometimes it was a bit ridiculous, but it taught me to be accountable for the effort and quality I put into my projects. To this day, we all still joke, “Good thing this isn’t for 4-H judging”!
So, where do YOU start?
Source: jonag.typepad.com via Alyssa on Pinterest
Pick a project! Pick something you WANT to do and that is a beginner level. The best way to learn is through experience! My first actual project was the elasticized skirt in first year 4-H. It was a hideous pattern and I didn’t love it, but I learned how to make an elastic waistband and how to hem!
Source: lucyina.com via Alyssa on Pinterest
Gather your goodies! Be sure to have the basic supplies you will need to start a project. A few include: Fabric, matching thread, seam ripper, needles, rulers, good sewing scissors, straight pins, iron/ironing board, and a sewing machine if you are machine sewing. Many patterns also require certain notions {elastic, buttons, zippers, etc}. Requirements will be listed on the outer pattern envelope.
Once you pick your project, do a few practice exercises. Get to know your machine. Yes, I said it! Do the boring dirty work of reading the user manual. You will learn SO much and be better for it. My machine does things I used to dream about…go figure I CAN do that! {Here is a good resource for learning machine basics}
Start by exploring types of stitches…straight stitch and zigzag are ones you will use the most. Straight stitch is for basic seaming, while zig zag can be decorative or used to finish raw edges so they do not ravel. {Here is a step-by-step how-to for sewing a basic seam}
Next, explore stitch length and tensions. Some machines have dials for these features and others are more computerized with buttons. Again, refer to that handy manual!
Familiarize yourself with the lingo! Get to know words you will see on patterns and tutorials. Most pattern companies will include a glossary of terms on the main page of the sewing instructions pamphlet. Words like topstitch {To sew a row of stitching close to the seam or edge of (a garment) on the outer side of the fabric} and stay stitch {a single line of stitching, through one layer of fabric, to stabilize the fabric}. Facing {a piece of material used esp to conceal the seam of a garment and prevent fraying} and hem {made by folding an edge under and stitching it down}.
Don’t forget about the internet! I still use the mighty world wide web to find the best way to sew this or that. It is also a great resource for tutorials…for the novice or expert!
Over time, you will gain knowledge of HOW TO SEW. Not just sewing projects, but you will be able to look at a garment or item and just KNOW how it was sewn together. There are endless techniques, tips, and tricks out there. If you jump right in and challenge yourself, you will soon be a pro!
Know that YOU CAN do it! Many projects have left me high and dry without knowing how to save the mess I made. There is ALWAYS a way out…you just have to be creative {and own a seam ripper}!
Additional resources:
4-H Clothing Project Manual Sewing basics guide
Beginning 4-H projects with patterns
4-H Clothing Project Manual Sewing basics guide
Beginning 4-H projects with patterns
I hope this will inspire you to pick a project and GO FOR IT! It is never too late to learn. Once you have the basics under your belt, you can sew most anything.
LABELS:
sewing,
thursday threads

Jul 13, 2011
Open for Business!
Sweet Sewn Stitches Shop on Etsy is finally open for business {second time is a charm, I hope}!
I searched high and low for a vintage apron and did not find much that caught my eye. The famous words of my Mom echoed in my mind... "You could make that"! So I did.
Vintage chic children's aprons, natural pillow covers to add texture and style to your space, and hair accessories on the way.
I searched high and low for a vintage apron and did not find much that caught my eye. The famous words of my Mom echoed in my mind... "You could make that"! So I did.
Vintage chic children's aprons, natural pillow covers to add texture and style to your space, and hair accessories on the way.
May 27, 2011
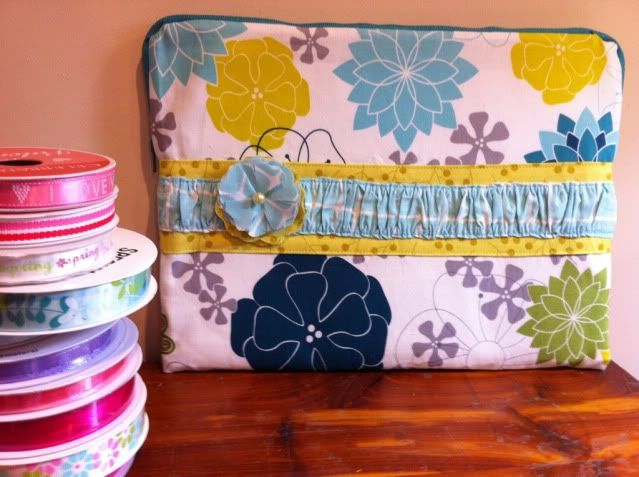
A Little Laptop Case
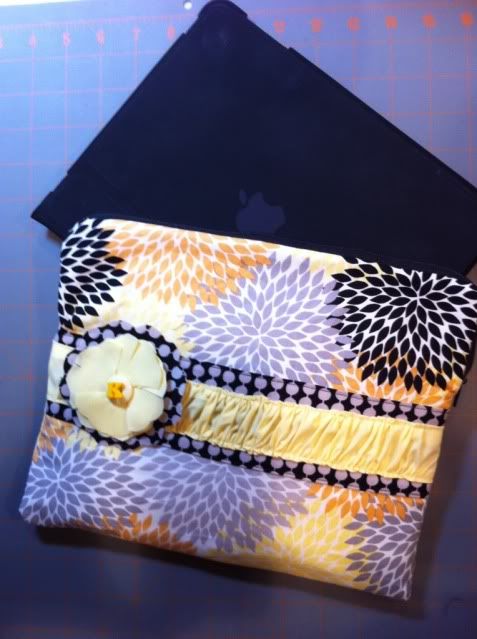
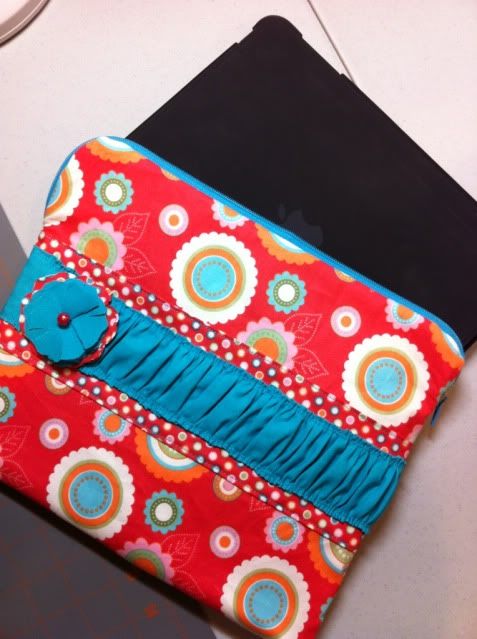
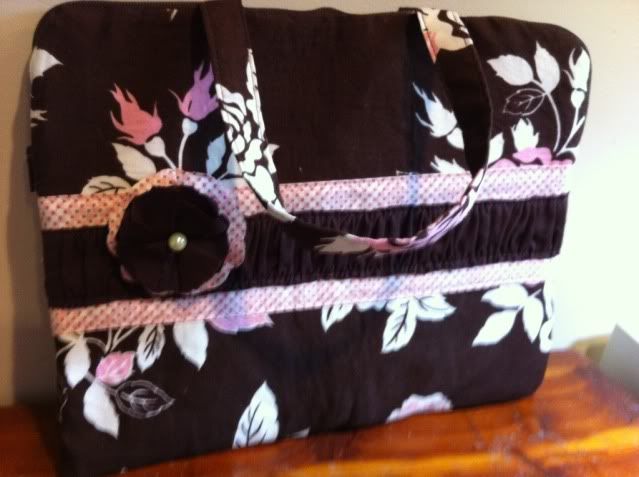
My sister fell in love with this tutorial for a zippered laptop case posted from Crap I've Made. I gave it a whirl and whipped one up for her last Christmas. Since then, I have been persuaded to make a few more as gifts.
The end result is a lot of fun, but definitely tricky to get everything lined up and fit together. If you can't wait to try this one, make sure you use a home dec fabric or thicker cotton. If you decide to use a quilter's cotton, interface the main panels. I also fused the fleece to the lining for more direct padding.
A few more finished iPad cases
May 11, 2009
I WON!
A bag, that is. I have been eye-ing a new beach bag from Ju-Ju-Be! It has so many goodies that will be great for a weekend at the lake and our Michigan vacation in June! It retails for $160 {crazy!}...and I won one for describing my perfect Mother's Day! I cannot wait for it to arrive!
I am on a kick of making simple, but very useful projects. Here are a few I made today...a checkbook cover and wet bag {for wet and soiled items}. The wet bag is made of laminated fabric and the design is compliments of my mom, Sylvia Whitesides. All sewn using a few fat quarters. Can't wait to use them both!
Here it is....
I am on a kick of making simple, but very useful projects. Here are a few I made today...a checkbook cover and wet bag {for wet and soiled items}. The wet bag is made of laminated fabric and the design is compliments of my mom, Sylvia Whitesides. All sewn using a few fat quarters. Can't wait to use them both!
May 8, 2009
 Sweet Inspirations...
The inspiration of my makings is my sweet son, E. I love him to pieces and love sewing boutique baby items that are stylish, but also practical. I am not one to splurge on the latest and newest. As my mom always said..."You could make that for much less!" And so I have taken her advice and started making items that both E. and I both use and enjoy!
Subscribe to:
Posts (Atom)


